
Every great corporate event has one thing in common: great food and drink. Whether you’re welcoming new clients, celebrating a milestone, or gathering your team for a big meeting, the right catering makes the whole experience better. But with budgets to track, dietary needs to manage, and tight timelines to meet, planning can get tricky.
That’s why we’ve put together this simple, step‑by‑step checklist. From setting your goals and budget to double‑checking the final run sheet, each item will keep you on track and stress‑free. Follow along, and you’ll turn your next event into a seamless, memorable experience—one plate at a time.
1. Define Your Event Goals and Budget
Every successful catering plan starts with two questions: what do you want to achieve, and how much can you spend? Knowing whether your goal is to wow new clients, reward employees, or simply keep things running smoothly makes it easier to choose the right menu and service style. Setting a clear budget up front means fewer surprises later—so you can focus on creating a great experience, not worrying about costs.
Understanding Your Event Goals
Before you dive into menus and seating charts, get crystal clear on why you’re hosting this event. Your goals will guide every decision—from portion sizes to presentation style—and help you measure success afterwards. Here’s how to pin down your event objectives:
Identify your primary purpose
- Networking: Encourage conversation with easy‑to‑share finger foods and cocktail stations.
- Product launch or marketing: Showcase your brand’s personality with custom‑branded snacks or a signature cocktail.
- Employee appreciation: Create a warm, celebratory vibe with comfort‑food stations or a buffet of favourites.
- Training or workshops: Keep energy levels high with grab‑and‑go healthy options and plenty of hydrating beverages.
Define success metrics (KPIs)
- Attendance rate: Did you hit your RSVP targets?
- Engagement level: Were guests mingling and trying everything on the menu?
- Guest feedback: Use quick post‑event surveys to rate food quality and variety.
- Budget adherence: How closely did your actual spend match the estimate?
Align catering style to your message
- Formal, plated dinners reinforce a tone of prestige and exclusivity.
- Casual buffets or food stations invite exploration and relaxed networking.
- Passed hors d’oeuvres keep the pace moving, perfect for short receptions or product reveals.
Establishing Your Event Budget
Establishing a realistic budget up front will keep your catering costs predictable and prevent unwelcome surprises. Here’s how to build and manage a budget that covers every detail without breaking the bank:
1. Set an overall spending cap
Decide on a firm maximum you’re willing to allocate to catering—this gives you guardrails for every decision that follows.
2. Break the budget into categories
- Food & beverages: Estimate a per‑head cost based on your chosen service style (buffet, plated, stations).
- Staff & service fees: Don’t forget gratuities, chef fees, and any overtime rates.
- Rentals & décor: Tables, chairs, linens, flatware, glassware, centrepieces, and linens.
- Logistics & extras: Delivery charges, setup/cleanup fees, permits, and insurance.
3. Research realistic benchmarks
- Ask your caterer for average per‑person costs at your desired service level.
- Compare at least two or three proposals to spot outliers and negotiate better rates.
4. Build in a contingency buffer (10–15%)
Last‑minute guest additions, menu upgrades, or unexpected equipment needs can easily push you over your estimate—plan for it.
5. Track every deposit and payment
- Use a simple spreadsheet or budgeting app with columns for “Estimated,” “Quoted,” “Deposited,” and “Balance Due.”
- Update it whenever you sign a contract, submit a payment, or revise your guest count.
6. Adjust as your guest list evolves
Review your budget whenever you nail down new headcounts or dietary needs—small tweaks early on are easier than major overhauls later.
2. Know Your Guest List
Getting a clear picture of who’s coming makes all the difference. When you lock in your headcount, flag dietary needs, and spot any VIPs, you’ll order just the right amount, avoid surprises, and ensure every guest feels looked after.
Identify the Type of Event
Different events call for different catering needs. Pinning down exactly what type of gathering you’re hosting helps you tailor your guest list—and your menu—so everyone feels catered to and comfortable. Here’s how to break it down:
Board Meetings & Small Conferences
- Size: Typically under 50 participants
- Pacing: Quick breaks, focused discussion
- Catering style: Coffee service with grab‑and‑go pastries, boxed lunches or plated light bites
Workshops & Training Sessions
- Duration: Half‑ or full‑day events
- Needs: Sustained energy and focus
- Catering style: Mid‑morning snacks (fruit, yoghurt, granola), hot buffet lunch, afternoon pick‑me‑ups like cookies or veggie platters
Networking Receptions & Cocktail Hours
- Atmosphere: Mingling, casual conversation
- Timing: 1–2 hours, typically before or after main programming
- Catering style: Passed hors d’oeuvres, high‑top tables, signature cocktails, or mocktails
Gala Dinners & Award Ceremonies
- Formality: Black‑tie or business dress
- Programme flow: Speeches, presentations, plated courses
- Catering style: Multi‑course plated service or staged food stations with attentive waitstaff
Product Launches & Brand Activations
- Brand focus: Visuals and messaging front and centre
- Interactive elements: Branded food stations, signature drinks, photo‑op snacks
- Catering style: Themed stations that tie into your product story (e.g., “build‑your‑own” bars, colour‑coordinated desserts)
Outdoor or Team‑Building Events
- Logistics: Weather considerations, limited kitchen access
- Food durability: Items that travel well and stay fresh
- Catering style: Boxed or buffet style with heartier fare—think sliders, wraps, robust salads
Holiday Parties & Celebrations
- Mood: Festive and fun
- Extras: Themed décor, seasonal flavours
- Catering style: Family‑style platters, shared dessert tables, hot cocoa or mulled wine stations
Categorise Your Guests
To make sure every attendee feels valued—and to smooth out service flow—break your guest list into clear categories. This helps you plan plating sizes, seating, menu options, and any special touches. Here’s how to organise your list:
VIPs & Speakers
- Why it matters: These guests often have special seating, photo‑ops, or speaking slots.
- Action: Reserve front‑row seats or a dedicated table; consider a plated course or premium beverage pairing.
- Tip: Send a personal reminder email with arrival details and any speaker briefs.
Clients & Prospects
- Why it matters: You want to leave a strong impression and encourage networking.
- Action: Offer a mix of approachable small bites (so they can juggle a plate and business card) and signature cocktails that tie into your brand.
- Tip: Group them near your hosts or account managers to facilitate introductions.
Employees & Internal Team
- Why it matters: These are your brand ambassadors—keep them comfortable and engaged.
- Action: Provide familiar comfort‑food options alongside any themed fare, plus non‑alcoholic mocktails.
- Tip: Consider a team‑photo moment near the food stations to boost morale and social sharing.
Dietary‑Restricted Guests
- Why it matters: Allergies and preferences can’t be an afterthought—you need clear labels and safe prep zones.
- Action: Create sub‑menus or colour‑coded markers (e.g., purple for vegan, green for gluten‑free).
- Tip: Brief your service staff on cross‑contamination protocols and have backup options ready.
Sponsors & Partners
- Why it matters: They’ve invested in your event—give them priority access and visibility.
- Action: Offer a branded tasting station or a special “thank you” platter at their table.
- Tip: Include a small take‑home gift (e.g., branded chocolate or a mini cocktail kit).
General Attendees
- Why it matters: This group makes up the bulk of your numbers—efficient flow is key.
- Action: Plan buffet lines or stations in a horseshoe or island layout to avoid crowding.
- Tip: Post clear signage and encourage staggered breaks (by department or table) to minimise queues.
Plus‑Ones and Guests of Honour
- Why it matters: Their experience reflects back on your hosts or honorees.
- Action: Place them at tables with hosts, and offer a small welcome drink on arrival.
- Tip: Provide escort cards that double as a keepsake—elegant and functional.

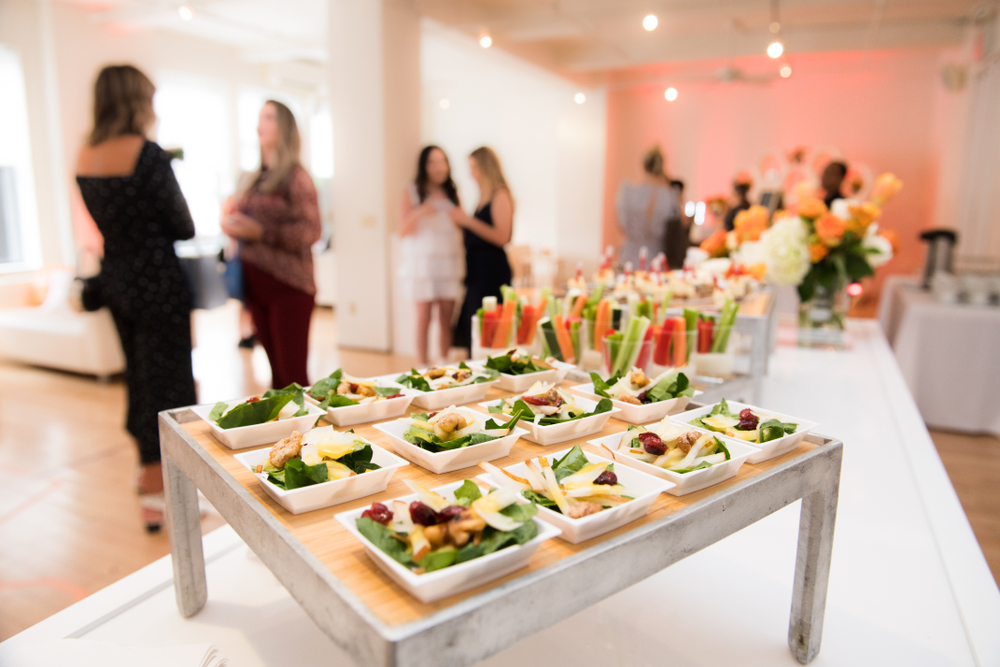
3. Choose the Right Catering Style
Choosing the right catering style sets the tone for your entire event—whether you want formality, flexibility, or a fun, interactive vibe. Here’s a breakdown of the most popular service options, with pros, cons, and key considerations to help you decide.
Plated Service
A classic, sit‑down, multi‑course meal served to guests at their tables.
Pros
Highly polished and controlled experience
Clear pacing—you decide when each course is served
Ideal for formal speeches or presentations
Cons
- Highest staffing and service cost
- Guests can’t mix and mingle during courses
- Requires precise timing and coordination
Best For
- Black‑tie galas or award ceremonies
- Client dinners where conversation is table‑focused
- Events with a formal programme of speeches
Key Considerations
- Ensure enough space between tables for servers
- Confirm plating timelines with your caterer
- Allow extra time for clearing and resetting between courses
Buffet & Food Stations
Guests serve themselves from a variety of dishes laid out on one or more tables.
Pros
- Greater menu variety and guest choice
- Encourages mingling and casual interaction
- Often more budget‑friendly per person
Cons
- Potential for long lines if not well‑designed
- Food can cool off if stations aren’t monitored
- Harder to control portion sizes
Station Styles
- Linear Buffet: Single long table—good for small to mid‑size groups
- Island Stations: Multiple islands placed around the room to avoid crowding
- Themed Stations: Ethnic cuisine corners (e.g., “Taco Bar,” “Mediterranean Mezze”) for an experiential twist
Key Considerations
- Plan station placement for smooth traffic flow
- Provide clear signage and serving utensils at each dish
- Assign staff to monitor food levels and temperature
Cocktail Reception
Passed hors d’oeuvres and high‑top tables—perfect for short, networking‑focused gatherings.
Pros
- Keeps guests moving and mingling
- Lower food cost—smaller portions of high‑impact bites
- Easy to tailor to themed or branded events
Cons
- Guests may still feel hungry if bites are too small
- Requires ample service staff for passing trays
- Limited seating can leave some guests standing
Best For
- Investor meet‑and‑greets or launch events
- After‑hours networking
- Times when a full meal isn’t needed
Key Considerations
- Offer a mix of hot and cold bites for variety
- Balance quantity: plan for roughly 6–8 pieces per person per hour
- Include a signature drink station or branded glassware
Family‑Style Sharing
Large platters of food passed around each table for guests to share.
Pros
- Warm, communal atmosphere
- Guests control their portions and pacing
- Reduces service staff compared to plated courses
Cons
- Can slow down service if guests wait on one another
- Requires sturdy shared platters and large tables
- Harder to guarantee even distribution
Best For
- Team‑building luncheons
- Casual celebrations where conversation is key
- Events aiming for a home‑like, relaxed feel
Key Considerations
- Use round or oval tables for easy passing
- Brief staff on topping‑up platters discreetly
- Offer individual backup plates for guests with dietary needs
Hybrid & Custom Solutions
Mix and match styles to suit your unique event flow and goals.
- Buffet + Plated Dessert: Formal meal, then casual dessert station
- Passed Apps + Family‑Style Entrée: Starts mingling, then moves to seated sharing
- Interactive Stations + Plated Finale: Keeps energy up, finishes with a focal point
Key Considerations
- Map out guest movement and seating transitions
- Coordinate timing between different service teams
- Communicate clearly on invitations if guests will switch from standing to seated

4. Set Your Menu
Crafting a menu that delights every palate means more than just picking crowd‑pleasers—it’s about balance, creativity, and thoughtful planning. Here’s how to build a menu that looks great, tastes even better, and keeps every guest happy.
Balance Flavours and Textures
- Mix rich and light: Pair a creamy, indulgent dish (think truffle mac ‘n’ cheese) with something bright and fresh (like a citrus‑dressed salad).
- Vary temperatures: Serve a selection of hot, warm, and chilled items to engage the senses.
- Play with textures: Combine crunchy elements (toasted nuts, crisp veggies) with silky or tender dishes (braised meats, panna cotta).
Embrace Seasonal & Local Ingredients
- Peak flavour, lower cost: Seasonal produce not only tastes better but often comes at a friendlier price point.
- Local partnerships: Showcase nearby farms or specialty purveyors—this tells a story and boosts your event’s “wow” factor.
- Example menu switch: Swap winter squash soup for a chilled gazpacho in summer, or spotlight farm‑fresh berries in desserts.
Cater to Dietary Restrictions
- Build in clear options: Label dishes as vegan, vegetarian, gluten‑free, dairy‑free, or nut‑free so guests can choose with confidence.
- Offer at least one protein alternative: If you’re serving chicken and beef, include a hearty plant‑based entrée (e.g., stuffed portobello with quinoa).
- Prevent cross‑contamination: Work with your caterer to establish separate prep areas or colour‑coded serving utensils.
Plan Thoughtful Beverage Pairings
Match wine to food profiles:
- Full‑bodied reds for rich meats (beef tenderloin, lamb).
- Crisp whites or rosés alongside seafood, salads, or light pastas.
Beyond alcohol:
- Craft a signature mocktail that ties to your brand colours or theme.
- Include a non‑alcoholic station with infused waters (cucumber‑mint, berry‑lemon) and artisanal sodas.
Timing matters:
- Serve welcome drinks on arrival, offer mid‑service palate cleansers (e.g., sorbet shooters), and toast‐ready bubbles at key moments.
5. Select the Right Venue
Your venue sets the stage for everything—from how smoothly your caterer can work to how comfortably your guests move around. Choosing wisely now will save headaches later.
Assess Kitchen & Prep Facilities
On‑site kitchen access
- Full kitchens allow hot dishes to be finished on location and reduce travel time.
- If there’s no kitchen, confirm whether your caterer can bring mobile cooking equipment (warming ovens, induction burners).
Staging and storage areas
- Look for a dry, secure space to unload ingredients and store chilled items.
- Check for adequate refrigeration and shelving, or arrange for rented coolers.
Location is Key
The location of your venue can significantly influence attendance:
- Proximity to Business Districts: If your event is during work hours or requires a quick commute, choosing a venue near Melbourne’s central business districts can be advantageous.
- Local Attractions: Venues near popular attractions can offer additional appeal, especially if your event includes out-of-town guests.
- Safety and Security: Research the surrounding area to ensure it is safe and secure for your attendees.
Map Out Guest Flow & Layout
Capacity & Room Shape
Capacity vs. comfort
- Don’t squeeze more people in than the fire code or comfort level allows—you want guests to circulate easily.
Table and station placement
- Wide aisles (at least 4–5 feet) prevent bottlenecks at buffet lines or bar areas.
- Consider a horseshoe or island layout to distribute traffic evenly.
Entrance & Service Access
Loading zones
- Make sure caterers can park close by and unload equipment without lugging it too far.
Service corridors
- Back‑of‑house hallways or service entrances help servers move unseen and keep guests immersed in the experience.
Verify Power, Water & Logistics
Electrical capacity
- Confirm outlet locations and amperage for coffee machines, warming lamps, and AV equipment.
- If insufficient, plan for generators or heavy‑duty power drops.
Water supply and drainage
- Caterers need easy access to fresh water and a drain for dishwashing or cleaning stations.
Internet & Wi‑Fi
- If your caterer uses tablets for orders or you plan livestreams, test bandwidth and coverage.
Consider Ambience & Practical Extras
Acoustics & Lighting
- Hard floors and high ceilings can echo—plan for carpet runners or draping.
- Ensure lighting levels work for both food presentation and guest comfort.
Climate control
- Indoor venues should have reliable HVAC; outdoor spaces may need tents, fans, or heaters.
Restroom proximity
- Guests shouldn’t have to wander too far—poorly placed facilities can disrupt catering flow.
Confirm Licencing, Permits & Insurance
Liquor licence
- If you’re serving alcohol, either the venue needs a licence or you must obtain a permit.
Health permits
- Some jurisdictions require additional permits for outside caterers—double‑check local regulations.
Liability coverage
- Verify the venue’s policy and ensure your caterer carries at least $1 million in general liability insurance.
6. Book Your Caterer Early
When planning corporate catering in Melbourne, securing a reliable caterer should be at the top of your to-do list. Booking your caterer early means better menus, fresher ingredients, and one less thing to worry about. Here’s how to make it painless:
- Start ASAP: Lock in your top choice as soon as you set the date—good caterers book up fast.
- Get a few quotes: Share your date, guest count, and style, then compare sample menus, prices, and what’s included.
- Taste before you commit: Narrow to two or three and do a quick tasting to make sure the food, portion sizes, and presentation hit the mark.
- Sign a clear contract: Check deposit amounts, cancellation rules, and exactly who provides linens, staff, and cleanup.
- Keep the lines open: Touch base a few months, weeks, and days before the event to reconfirm headcount, dietary needs, and delivery details.
- Have a backup plan: Jot down an alternate caterer and key contacts in case of emergencies—better safe than sorry.

7. Consider Equipment, Furniture & Extras
Choosing the right mix of equipment, furniture, and extras turns a good event into a seamless, memorable experience. From the tables your guests dine at to the little finishing touches that make the space feel special, here’s how to get everything in place without last‑minute scrambles.
Furnitures & Layout
- Tables & chairs: Pick the shape (round, banquet, high‑top) that fits your vibe and room.
- Cover extra seats: Have a few spares for last‑minute guests.
- Lounge spots: A small seating area with sofas or lounge chairs gives people a place to relax.
Tableware & Linens
- Plates, glassware, and flatware: Match your service style—full sets for plated meals, basics or disposables for casual buffets.
- Napkins & tablecloths: Choose colours that fit your theme and order a few extras to handle spills.
Décor & Branding
- Centrepieces: Keep them low so guests can see each other.
- Signage: Simple signs to guide guests (restrooms, bar, buffet) and branded touches like logo napkins or menu cards.
Tech & Extra
- Audio‑visual: Confirm microphones, speakers, and screens work in your space.
- Lighting: Uplights or dimmers help set the mood—bright enough to eat, soft enough to mingle.
- Trash & recycling: Place clearly labelled bins near food areas so cleanup stays tidy.
8. Finalise Run Sheet and Timings
A solid run sheet is your event’s roadmap—every cue, course, and conversation happens right on time. Here’s how to lock down your timing and keep everyone in sync:
Map Out the Key Moments
- Setup: Allow 2–3 hours before doors open for caterers and AV to unload and test.
- Guest Arrival: Start registration and welcome drinks right on time.
- Service Flow:
- Starters: Kick off about 15 minutes after guests arrive.
- Mains & Speeches: Coordinate food service with presentation cues.
- Dessert & Mingling: Slide into casual networking once talks wrap up.
- Wrap‑Up: Plan a quick thank‑you, then let the team begin teardown.
Assign Who Does What
- Event Coordinator: Keeps an eye on the clock and flags any delays.
- Catering Lead: Manages food‑service cues and course timing.
- AV Tech: Runs mics, music, and slides at the right moments.
- Venue Contact: Handles doors, restrooms, and venue logistics.
Build in Buffers
- Leave 10–15 minutes of breathing room around big transitions (like arrival → speeches or mains → dessert).
- Have backup gear on hand (extra mic batteries, spare laptop) and a simple rain plan if outdoors.
Share & Confirm
- Send the final timeline to everyone (caterer, AV, venue staff) at least a week before.
- Print a one‑page run sheet for on‑site use and do a quick team huddle on the day.
Stay Flexible
- Schedule brief check‑ins at setup, just before doors open, and midway through service.
- Empower one person (usually the coordinator) to tweak timings on the fly if needed.

9. Confirm and Reconfirm
Locking in every detail means fewer last‑minute surprises. Here’s a streamlined way to check—and re‑check—everything before showtime:
Final Checks
- Guest count & diets: Send your caterer the final headcount and any last‑minute dietary needs.
- Menu & service style: Approve the exact dishes, portion sizes, and how they’ll be served.
- Venue logistics: Confirm load‑in times, parking or dock access, plus power and water hookups.
- Rentals & décor: Double‑check tables, chairs, linens, glassware, and centrepieces.
- Staffing & AV: Verify the number of servers/bartenders and test mics, speakers, and screens.
- Run sheet & timing: Make sure everyone has the latest minute‑by‑minute schedule.
Reconfirmation Timeline
One Month Before
- Send final headcount and dietary list.
- Sign off on the menu and portion sizes.
- Confirm rental orders with your vendor.
One Week Before
- Reconfirm setup and delivery times with caterer, AV, and rental teams.
- Share the run sheet with all key contacts.
- Ensure permits and insurance docs are on file.
24 Hours Before
- Call your caterer and venue to reconfirm load‑in windows and point persons.
- Print updated run sheets, seating charts, and a vendor contact list.
- Pack your “event kit”: timelines, contracts, extra chargers, and emergency numbers.
Day of Event
- Greet each vendor on arrival and walk through the space together.
- Hold a quick team huddle 30 minutes before doors open.
- Use a group chat or radio for instant updates if timings shift.
Pro Tips
- Keep one shared document so everyone sees real‑time changes.
- Assign a single point person for each vendor to streamline questions.
- Send short, bullet‑point reminders rather than long emails.
- Rely on your built‑in buffers—if something runs long, you’ve planned for it.
Catering a corporate event doesn’t have to be overwhelming. Nail down your goals and budget, know who’s coming, pick a service style that fits your brand, and build a menu everyone will love. Lock in the right venue, book your caterer early, sort out tables and tech, and map out your timing—then confirm every detail before showtime.
Ready to make your next event seamless and unforgettable? Reach out to Essential Catering today, and let us handle the food so you can focus on the fun.